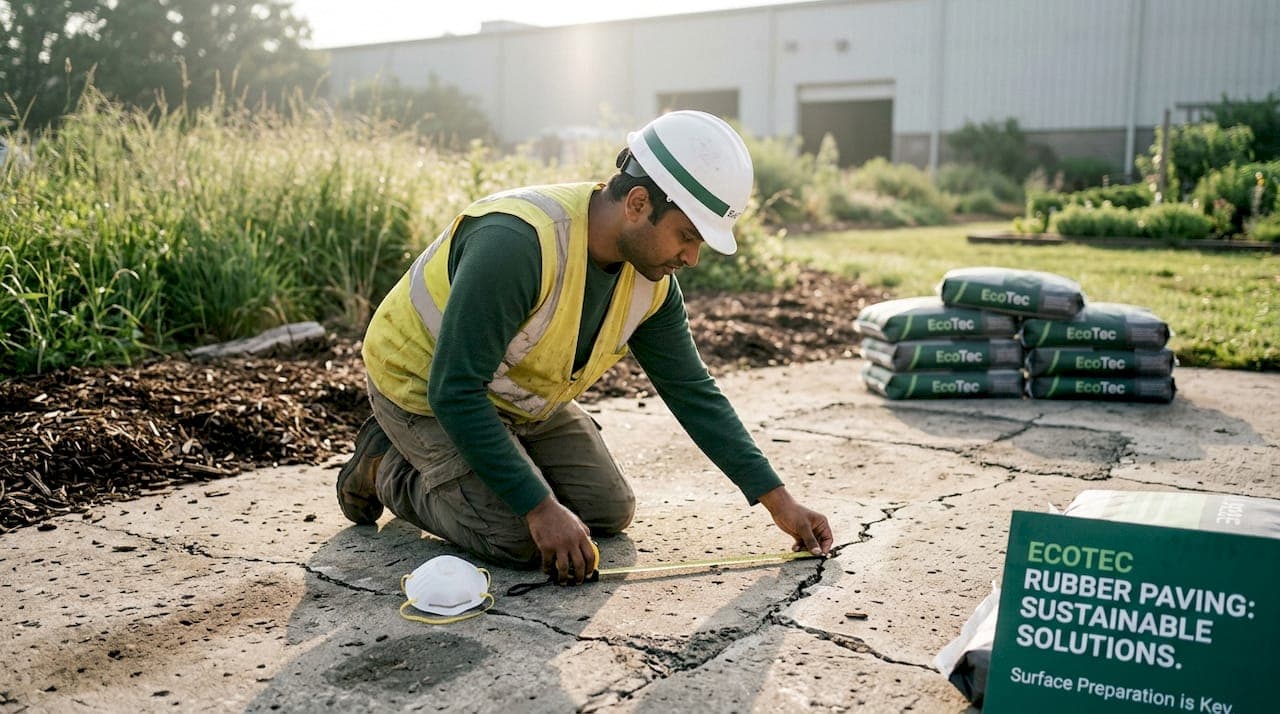
Surface preparation is the single most important factor determining whether a rubber paving installation lasts five years or twenty. Up to 80% of premature coating failures trace directly back to inadequate surface prep, not product defects or installation errors. That number should stop every contractor and property developer in their tracks. The role of surface prep in rubber paving is not a preliminary checkbox. It is the foundation that controls adhesion, drainage performance, and long-term durability. This article covers the specific substrate conditions, surface preparation techniques, drainage requirements, and common mistakes that determine whether your rubber paving holds up or fails under Florida's heat and humidity.
What surface conditions must be met before rubber paving installation?
The substrate beneath rubber paving must meet precise physical and chemical criteria before any material touches it. Miss one condition, and you are building on a compromised foundation regardless of the quality of the rubber product you choose.
Flatness tolerance is the first non-negotiable. Substrate flatness must stay within 2mm deviation over any 2-meter span. Deviations beyond that threshold cause the rubber to telegraph every bump and hollow to the surface, creating visible imperfections and stress points that crack over time. Use a 2-meter straight edge and feeler gauges to verify flatness before proceeding.
Cleanliness is equally critical. Concrete, asphalt, and wood substrates must be completely free of dust, oil, grease, old paint, and sealers. Oil contamination is particularly problematic because adhesives cannot penetrate an oily film, no matter how aggressively you apply them. Chemical degreasers like trisodium phosphate (TSP) solutions remove oil effectively from concrete, while mechanical wire brushing handles loose paint and sealers.
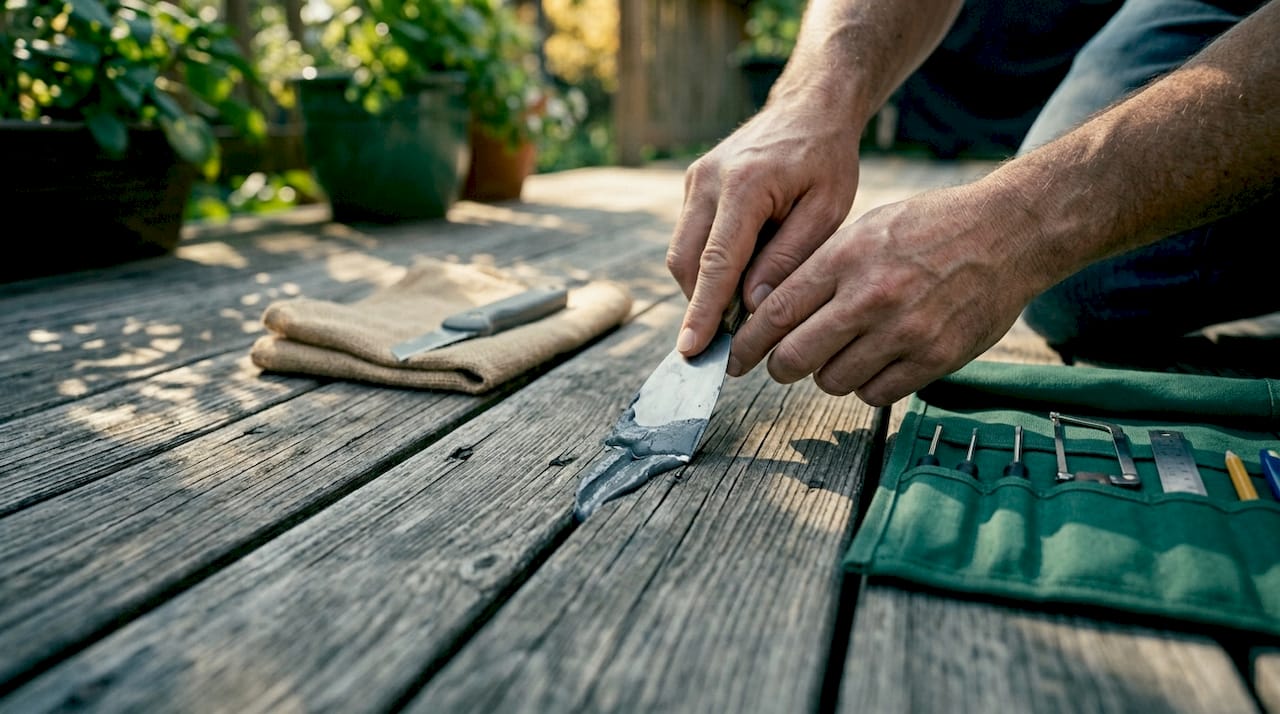
Crack and void repair must happen before any primer or adhesive goes down. Unfilled cracks, holes, and divots create weak points where rubber flexes independently of the substrate. Over time, that flex causes delamination. Fill all cracks with a polyurethane or epoxy crack filler rated for the substrate type, then allow full cure before moving forward.
Moisture testing is the step most contractors skip and most regret. Moisture trapped beneath rubber surfaces is a leading cause of adhesive breakdown and mold growth. Use a calcium chloride test or an in-situ relative humidity probe to confirm moisture vapor emission rates fall within the adhesive manufacturer's specified limits. For concrete slabs in Florida, where ground moisture is persistent, this test is not optional.
The prep requirements also vary by substrate type:
- Concrete: Grind or shot blast to remove laitance (the weak surface layer), fill cracks, test moisture, and prime porous areas.
- Wood: Secure all loose boards, sand smooth, and apply a moisture-blocking primer before adhesive.
- Steel: Remove rust and mill scale by abrasive blasting, then apply a corrosion-inhibiting primer rated for rubber adhesive compatibility.
Pro Tip: Always perform moisture testing at least 24 hours after any cleaning or grinding work. Wet grinding raises surface moisture temporarily and can produce a false high reading that clears once the slab dries.
Which surface preparation techniques work best for rubber paving?
Not all surface preparation techniques deliver the same results. The right method depends on the substrate condition, the level of contamination, and the surface profile required for the adhesive system you are using.
Mechanical grinding and shot blasting are the gold standard for creating the surface profile that adhesives need to bond properly. Grinding removes laitance, old coatings, and high spots while opening the concrete pores. Shot blasting goes further, creating a uniform textured profile across large areas quickly. Both methods produce a surface that adhesives grip at a microscopic level, which is why professional installers prefer them over hand sanding or acid etching.
The table below compares the most common surface preparation techniques for rubber paving applications:
| Technique | Best for | Key benefit | Limitation |
|---|---|---|---|
| Mechanical grinding | Concrete with coatings or laitance | Creates precise surface profile | Slow on large areas |
| Shot blasting | Large concrete or asphalt areas | Fast, uniform profile creation | Requires specialized equipment |
| Chemical cleaning (TSP, degreasers) | Oil and grease contamination | Removes organic contaminants | Does not create surface profile |
| Acid etching | Smooth, dense concrete | Opens pores for adhesion | Leaves residue requiring neutralization |
| Self-leveling compound | Uneven or low-spot substrates | Corrects flatness efficiently | Requires priming and full cure time |
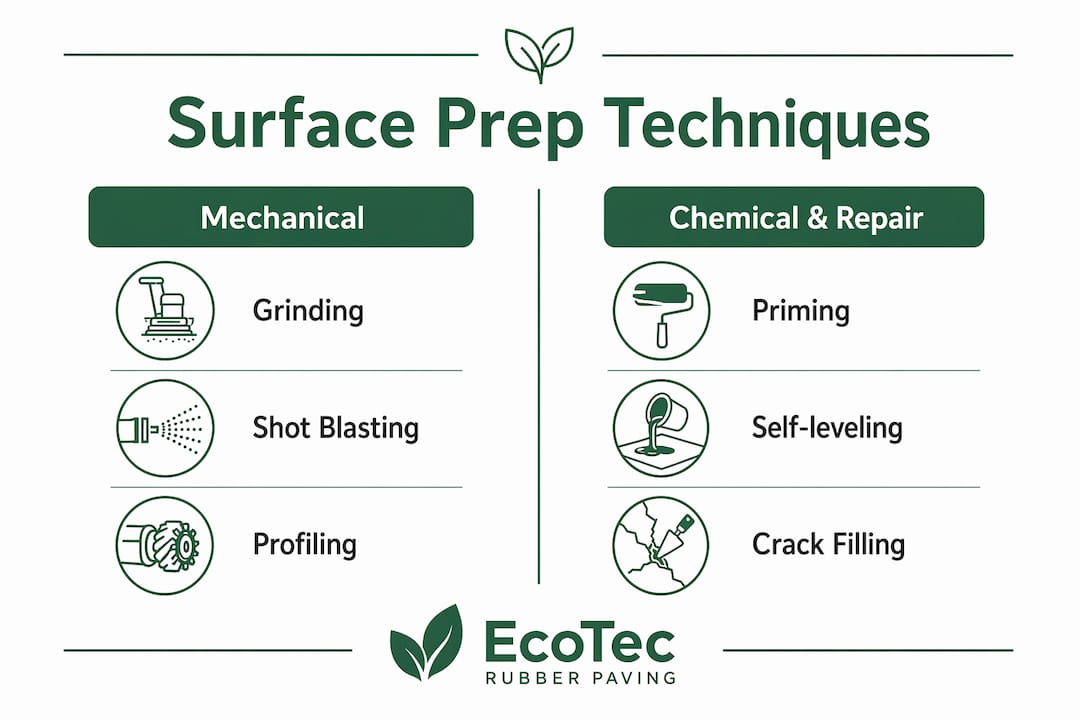
Self-leveling compounds correct uneven substrates and are particularly useful when grinding alone cannot bring a floor within the 2mm flatness tolerance. The critical detail most installers miss: the substrate must be primed before the compound is poured, and the compound must reach full cure before any rubber goes down. Rushing this step causes the compound to delaminate, taking the rubber with it.
Priming porous concrete before adhesive application is not optional on most substrates. Primers seal the surface, reduce adhesive absorption into the concrete, and create a consistent bonding layer. On dusty or highly porous surfaces, skipping the primer means the adhesive soaks into the substrate instead of bonding to the rubber.
Pro Tip: After mechanical grinding or shot blasting, vacuum the surface thoroughly and wipe with a damp cloth. Run your hand across the surface. If you pick up dust, the surface is not clean enough for adhesive. Repeat cleaning until the surface stays clean.
How does drainage and substrate grading affect rubber paving longevity?
Drainage design is where many rubber paving projects fail silently. The surface looks fine at installation, then deteriorates within two years because water is pooling beneath or around the edges.
Drainage slopes must maintain a minimum 1.5 to 2% cross-fall to prevent water from ponding on or around the paved surface. That translates to a 15mm to 20mm drop over every 1 meter of surface width. In Florida's climate, where heavy rain events are routine, anything less than this minimum creates standing water that accelerates surface deterioration.
The consequences of inadequate drainage are compounding:
- Standing water infiltrates seams and edges, weakening the adhesive bond over time.
- Moisture beneath the rubber creates conditions for mold and biological growth, particularly in shaded areas.
- In climates with temperature swings, freeze-thaw cycles expand trapped water and physically lift the rubber from the substrate.
- Prolonged moisture exposure softens the subbase, causing differential settlement that creates visible humps and depressions.
Verifying drainage falls before installation requires a simple water test. Pour a bucket of water onto the prepared substrate and observe where it flows. If it pools anywhere, the substrate needs regrading or the installation of channel drains before rubber paving proceeds.
Correct drainage slope is not a finishing detail. It is a structural requirement. A rubber paving installation on a flat or reverse-fall substrate is a liability, not an asset.
Setting the correct slope during substrate preparation means using a laser level or a digital slope meter to confirm falls across the entire installation area. For new concrete pours, set formwork to the correct fall before pouring. For existing substrates, use a self-leveling compound or grinding to correct low spots and redirect drainage paths.
What are the most common surface prep mistakes and how do you avoid them?
The most expensive rubber paving failures share a common origin: shortcuts taken during surface preparation. These are the mistakes that appear most frequently on job sites and in DIY installations.
- Skipping moisture testing. Installing rubber over a substrate with excessive moisture vapor emission causes the adhesive to break down within months. Always test, always document the results, and always compare against the adhesive manufacturer's maximum allowable moisture levels.
- Installing over dusty or oily surfaces. Dusty or oily substrates cause adhesive failure and premature lifting. Cleaning is not complete until the surface passes a hand-wipe test with no residue transfer.
- Ignoring minor surface imperfections. A 3mm bump feels insignificant before installation. After rubber paving goes down, it becomes a visible raised point that concentrates foot traffic wear and eventually cracks.
- Rushing primer or leveling compound cure times. Manufacturers specify cure times for a reason. Applying adhesive over an incompletely cured primer or compound traps solvents and creates a weak bond layer.
- Not priming porous surfaces. On high-absorption concrete or old adhesive residues, skipping the primer means the adhesive never reaches working strength. The rubber bonds to a weak, saturated layer rather than the substrate itself.
- Assuming old coatings are stable. Old paint, sealers, or adhesive residues may appear solid but often have poor adhesion to the substrate beneath them. Rubber paving applied over unstable coatings inherits all of their weaknesses.
Pro Tip: Follow the adhesive manufacturer's technical data sheet for every step, not just the mixing ratio. Cure times, application temperatures, and open times are all specified for a reason. Deviating from any one of them can compromise the entire installation.
The bond-first approach used by professional installers treats moisture testing and surface cleanliness as pass-fail criteria, not suggestions. If the substrate does not pass, installation does not proceed. That discipline is what separates installations that last from those that fail within the warranty period.
Key takeaways
Proper surface preparation determines rubber paving durability more than any product choice, with moisture control, flatness, and cleanliness as the three non-negotiable criteria.
| Point | Details |
|---|---|
| Surface prep drives durability | Up to 80% of paving failures trace back to inadequate preparation, not product defects. |
| Flatness tolerance is strict | Substrate must stay within 2mm deviation over 2 meters to prevent telegraphing and bond failure. |
| Moisture testing is mandatory | Always test vapor emission rates before installation, especially on concrete slabs in humid climates. |
| Drainage slope prevents failure | Maintain a minimum 1.5 to 2% cross-fall to prevent ponding water from undermining adhesive bonds. |
| Primers protect porous substrates | Apply primer to porous or dusty concrete before adhesive to prevent absorption and weak bonding. |
Why surface prep matters more than the rubber you choose
I have reviewed enough failed rubber paving installations to say this with confidence: the product almost never causes the failure. The substrate does. Property developers who spend weeks selecting the right rubber system and then hand the prep work to the cheapest subcontractor are making a predictable mistake. The prep is where the money is actually spent, and where the longevity is actually determined.
Moisture testing is the single most underestimated step in the entire rubber paving process. I have seen brand-new concrete slabs in Florida test at moisture vapor emission rates three times the adhesive manufacturer's limit. The slab looks dry. It feels dry. But the calcium chloride test tells a different story. Skipping that test to save two hours is how you end up replacing a paving installation in year two instead of year fifteen.
The other thing I would tell every DIY installer: do not treat the flatness requirement as approximate. Two millimeters over two meters sounds like a tight tolerance, but it is achievable with a straight edge and a bag of patching compound. The installers who skip this step are the ones calling about bubbles and seam failures six months later.
Surface prep is not glamorous work. It does not photograph well. But it is the work that makes everything else perform. Invest the time and the right tools in preparation, and the rubber paving installation takes care of itself for years.
— Gm
Get professional rubber paving results with Ecotecrubber
Ecotecrubber brings the preparation discipline and technical expertise that rubber paving demands. Their Rubberway® installations in Florida are built on a foundation of rigorous substrate assessment, moisture testing, and professional-grade surface preparation before a single piece of rubber goes down. For property developers, municipalities, and contractors who need ADA-compliant, drainage-optimized surfaces that hold up in Florida's climate, Ecotecrubber delivers. Explore the full range of Rubberway paving products or contact Ecotecrubber directly for a custom quote on your next project.
FAQ
What is the role of surface prep in rubber paving?
Surface preparation controls adhesion, drainage performance, and long-term durability in rubber paving. Without a clean, flat, moisture-tested substrate, even the highest-quality rubber system will fail prematurely.
How flat does a substrate need to be for rubber paving?
The substrate must stay within a 2mm deviation over any 2-meter span. Deviations beyond this threshold cause visible surface imperfections and stress points that lead to cracking and delamination.
Why is moisture testing critical before rubber paving installation?
Moisture trapped beneath rubber surfaces breaks down adhesive bonds and promotes mold growth. Testing vapor emission rates before installation, particularly on concrete slabs, prevents adhesive failure that is costly to repair.
What is the minimum drainage slope for rubber paving surfaces?
A minimum cross-fall of 1.5 to 2% is required to prevent water ponding. That equals a 15mm to 20mm drop per meter of surface width, which directs water away from the installation and protects the adhesive bond.
Do I need to prime the substrate before installing rubber paving?
Priming is required on porous, dusty, or high-absorption concrete surfaces. Primer seals the substrate, prevents adhesive from soaking in, and creates a consistent bonding layer that supports long-term adhesion.