

If your sidewalk has a vertical offset of a quarter inch or more, it fails inspection under the threshold most municipalities use, including Oakland's, and it needs to move into a repair track today, not next quarter. That's the whole verdict in one sentence. Everything else in this checklist exists to help you measure that offset correctly, classify the defect, and get through your city's permit process without a stop-work order or a lien on your title.
Three things happen next, in this order. First, you measure every crack and offset with a straightedge and a ruler or crack gauge, not a visual guess. Second, you photograph and log each defect with a location reference. Third, you either file for a permit and repair under standards like ACI Spec 503.7 for epoxy work, or you contact your municipality's permitting office (Portland's right-of-way permit process is a good model) for a provisional compliance certificate if you can't finish the work immediately.
Here's the pass/fail snapshot most inspectors work from:
- Vertical offset under 1/4 inch: Usually passes. Monitor and reinspect on your normal schedule.
- Vertical offset 1/4 inch or more: Fails. Requires grinding, shaving, or panel replacement depending on severity.
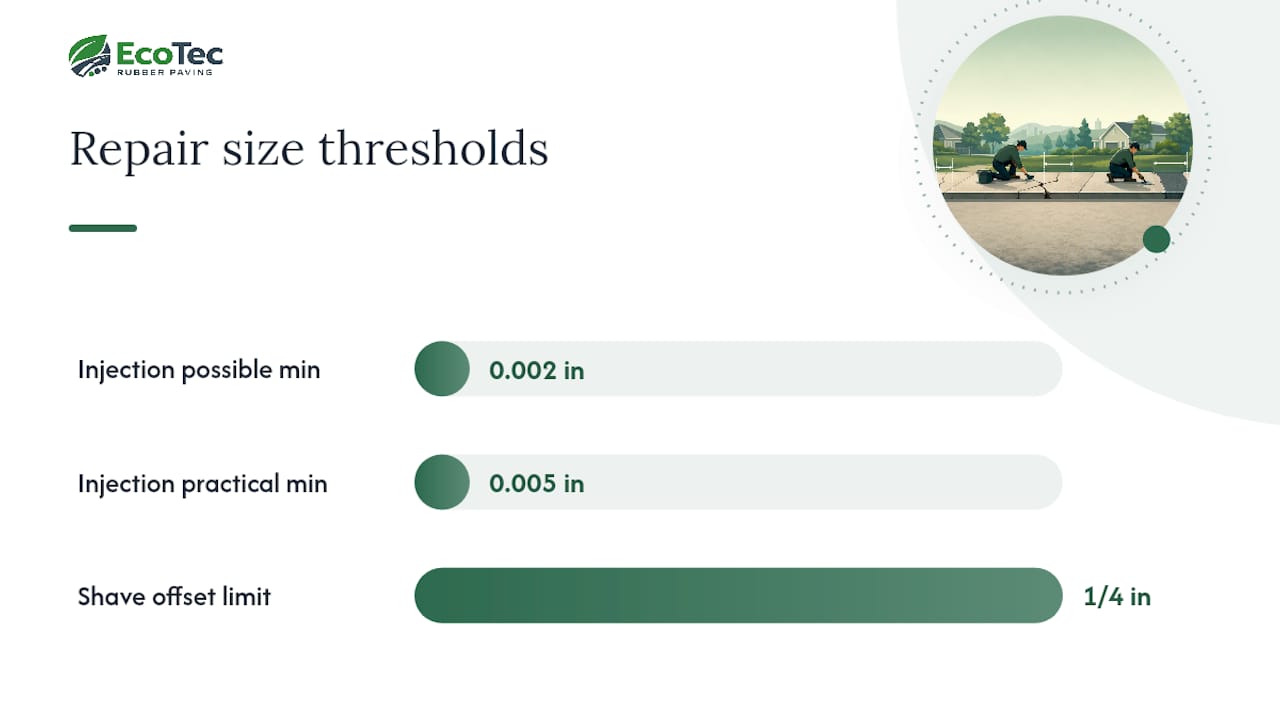
- Crack width under roughly 0.005 inch: Typically too narrow for epoxy injection to be practical, per TxDOT guidance.
- Crack width with visible spalling, root heave, or active movement: Fails. Move straight to full-panel evaluation.
- Any defect near a curb ramp or crossing: Treat as higher priority under ADA guidance, since accessible routes get stricter scrutiny.
Oakland's compliance program is worth studying even if you're not in California, because it's one of the more transparent public examples of how this process actually runs. The city treats any crack, depression, or vertical offset greater than a quarter inch as a defect, requires a Sidewalk Compliance Certificate at title transfer or major renovation, and allows a provisional certificate with a 120-day extension when repairs can't be finished on time. That pattern (defect threshold, certificate requirement, provisional window) shows up in one form or another across most municipal sidewalk programs.
Key Takeaways
Passing sidewalk compliance requires measuring vertical offset and crack width against a quarter-inch threshold, documenting every defect with located photos, and matching the repair method to the defect's actual cause.
| Point | Details |
|---|---|
| Quarter-inch rule | A vertical offset of 1/4 inch or more fails inspection under common municipal standards like Oakland's. |
| Measure before you classify | Use a straightedge and crack gauge, not a visual guess, to decide monitor versus repair versus replace. |
| Permits come before work | Most right-of-way repairs need a permit and a final inspection to close the Certificate of Compliance. |
| Documentation prevents disputes | Located, scaled photos and a paper trail speed up post-repair inspection approval. |
| Consider material, not just method | Ecotecrubber's rubber paving option flexes under root pressure and drains water, addressing recurring crack causes that concrete patches don't fix. |
Table of Contents
- Sidewalk Crack Repair Compliance Checklist: Step-by-Step
- How Do You Correctly Measure a Sidewalk Crack?
- What Standards and Thresholds Govern Sidewalk Repairs?
- What Permits and Certificates Does Sidewalk Repair Require?
- Which Repair Method Fits Your Sidewalk Defect?
- Who Should You Hire, and What Should You Demand?
- When Does Rubber Paving Make Sense Instead of Concrete Repair?
- Why a Compliance Checklist Protects You Legally and Financially
- A Longer-Term Option for Crack-Prone Sidewalks
- Primary Sources and Standards to Consult
- Frequently Asked Questions
- Sources
Sidewalk Crack Repair Compliance Checklist: Step-by-Step
This is the full sequence, from your first walk of the property to the closed compliance file. Skipping steps is how owners end up redoing work that already passed a visual check but failed the paperwork review.
- Walk the entire route. Cover every panel, ramp, and approach path, not just the spots someone already complained about.
- Flag every visible defect with chalk, a flag, or spray paint so you don't lose track between the walk and the measurement pass.
- Measure each flagged defect using a straightedge across the joint and a ruler or crack gauge to record the vertical offset and crack width.
- Classify each defect into a repair category: monitor, seal, shave/grind, epoxy injection, or full-panel replacement.
- Photograph each defect with a wide shot for location context and a close-up with a scale reference (a coin, tape measure, or crack gauge in frame).
- Log the location using a consistent address or panel-number system, so the same defect can be found again during post-repair inspection.
- Check scope against your municipality's threshold for self-certification versus permitted work (many cities draw the line around 25 square feet).
- Apply for the permit if the repair exceeds the self-certify threshold, or confirm your provisional certificate eligibility if you can't complete work before a deadline.
- Set up safety controls before work begins, including signage, barriers, and a temporary accessible path if the sidewalk stays partially open.
- Complete the repair using the method matched to the defect classification and the applicable material standard.
- Photograph the finished repair from the same angles as the "before" shots.
- Request the post-repair inspection, referencing your permit number and location log.
- File the closeout package: inspection report, contractor invoice, before/after photos, and the Certificate of Compliance once issued.
A few documentation details make or break that closeout package:
- Name photo files by address, panel number, and date, not generic filenames like "IMG_4021.jpg."
- Include one photo showing the crack gauge or ruler flat against the surface, in focus, with the reading legible.
- Keep a running log (spreadsheet is fine) that pairs each photo set with its measurement and repair category.
- Save the permit confirmation and any correspondence with the permitting office in the same folder.
Pro Tip: Take your "before" and "after" photos from the exact same spot and angle. Stand at a fixed landmark, like a utility pole or driveway edge, so an inspector comparing the two images side by side sees the same frame with the defect gone. Inspectors reviewing dozens of files a week move faster on submissions where that comparison is obvious.
How Do You Correctly Measure a Sidewalk Crack?
You need five tools, and none of them are expensive: a tape measure or ruler, a straightedge (a 4-foot level or a metal yardstick both work), a digital crack gauge, a pocket level, and a phone camera. A measuring wheel helps if you're covering a large municipal route with dozens of panels, but for a single property, the first four tools cover almost every case.
Here's the technique that holds up under municipal review. Lay the straightedge flat across the joint or crack, spanning at least a foot on each side of the defect. Slide the ruler or crack gauge underneath at the highest point of the offset and read the gap directly beneath the straightedge. That gap is your vertical offset measurement, and it's the number that decides whether you're looking at a quarter-inch pass/fail line or a clear failure.
Crack width gets measured differently. Place the crack gauge directly over the crack at its widest visible point on the surface, then check again at what looks like the deepest or most persistent section, since surface width and depth-related width can diverge, especially with freeze-thaw cracking. Record both numbers. If the crack tapers to under roughly 0.005 inch anywhere along its length, note that too, since it affects whether epoxy injection is even practical.
Good documentation shows the defect, the tool, and the reading in one frame, taken in daylight with the camera held level to avoid a distorted read on the gauge markings. Poor documentation is a blurry crack photo with no scale reference at all, which forces an inspector to ask for a resubmission and adds weeks to your timeline. Pay extra attention to transitions, the seams where a driveway apron meets the public sidewalk or where a curb ramp flares out to street level, because these are the spots ADA reviewers check first and where a small offset creates an outsized trip risk.
Pro Tip: Keep a $12 digital crack gauge in your glove box if you manage more than one property. It's faster and more consistent than eyeballing width with a tape measure, and the reading translates directly into the crack-width language most repair specs use.
What Standards and Thresholds Govern Sidewalk Repairs?
Three reference points come up on almost every permit application and inspection report. The ADA 2010 Standards govern accessible route requirements, including vertical change limits and detectable warning surfaces at curb ramps. ACI Spec 503.7 provides the evaluation, surface preparation, and execution checklist for crack repair by epoxy injection, and it's the document contractors should be citing on their submittals. ASTM material standards, including ASTM C881 for epoxy adhesives, define what qualifies as an acceptable bonding material for structural crack repair.
Municipal thresholds translate those standards into pass/fail numbers you can apply on a walk-through. Oakland's quarter-inch vertical offset rule is the most commonly cited benchmark nationally, and it lines up closely with what most engineering checklists, including Boston's sidewalk criteria, treat as the point where a defect stops being cosmetic and starts being a trip hazard. Crack width matters most for deciding repair method rather than pass/fail status on its own, since a wide crack with no vertical offset might still need to be sealed to prevent water infiltration and further heave.
Here's how defect type typically maps to threshold and corrective action:
| Defect Type | Common Threshold | Typical Corrective Action |
|---|---|---|
| Vertical offset | Under 1/4 inch | Monitor, reinspect on schedule |
| Vertical offset | 1/4 inch or more | Shave/grind or panel replacement |
| Narrow crack, no offset | Under ~0.005 inch width | Monitor or seal; injection often impractical |
| Structural crack | Wide, active movement, or spalling | Epoxy injection or full-panel replacement |
| Root-heave crack | Recurring offset near tree | Full-panel replacement with root barrier |
A quarter inch sounds small until you're pushing a stroller, a walker, or a wheelchair across it, which is exactly why that number keeps showing up across independent municipal programs rather than as an arbitrary local rule.
What Permits and Certificates Does Sidewalk Repair Require?
Public right-of-way work almost always requires a permit before you touch the concrete. Portland's process is a clean example: apply for the permit, complete the repair, then request a final inspection before the city signs off. Skipping the permit step is one of the most common reasons repairs get flagged again during a later property transaction, even when the concrete work itself was fine.
The typical sequence looks like this:
- Property owner identifies the defect (through self-inspection, a city notice, or a title transfer requirement).
- Owner applies for a right-of-way or sidewalk repair permit, or confirms self-certification eligibility for minor repairs.
- Owner hires a licensed contractor if the repair exceeds the self-certify scope.
- Contractor completes work under the permit conditions and applicable material standards.
- Owner or contractor requests a final inspection, referencing the permit number.
- City inspector reviews the work against pass/fail criteria.
- City issues a Certificate of Compliance, closing the file.
If you can't finish repairs before a deadline, most programs modeled on Oakland's system allow a provisional compliance certificate with a 120-day extension, sometimes with additional extensions available if you can document active progress. Keep this in mind for closing documents:
- Required for permit application: completed application form, site sketch or address, contractor license number if applicable.
- Required for final compliance: inspection report, contractor invoice describing scope, before/after photos, permit number.
- Municipal replacement programs, similar to Mount Vernon's process, sometimes split costs, with the city coordinating contractor work while the owner covers materials.
The consequences of skipping this process aren't hypothetical. Cities routinely perform the repair themselves and bill the property owner, and an unpaid bill can become a lien on the property, the kind of thing that surfaces at the worst possible moment, during a sale or refinance.
Which Repair Method Fits Your Sidewalk Defect?
Not every crack needs the same fix, and picking the wrong one either wastes money on overkill or creates a repeat violation within a year. Here's how the five common methods stack up.
Monitoring costs nothing upfront and works for hairline cracks with zero vertical offset. The risk is obvious: if the crack is actively growing from root pressure or settlement, monitoring just delays the eventual repair while the defect gets worse.
Surface sealing stops water infiltration on narrow, stable cracks and is cheap and fast. It does nothing for structural cracks or offsets, and using it as a substitute for real repair on a trip hazard is one of the more common mistakes owners make, since a sealed crack with a quarter-inch offset still fails inspection.
Shaving or grinding removes the raised lip of a minor offset without full panel replacement. Many jurisdictions, following Oakland's pattern, allow this without a full permit if the affected area stays under about 25 square feet, though even small repairs used to clear a compliance violation for a title transfer may need a licensed contractor or self-certification.
Epoxy injection restores structural bond in cracks with enough width for the resin to penetrate. TxDOT guidance notes injection is possible for cracks as narrow as roughly 0.002 inch but often impractical below about 0.005 inch, and it requires port spacing, surface sealing, and a test injection before full execution under ACI Spec 503.7.
Full-panel replacement is the answer for root heave, significant settlement, or repeated offset failures. It costs the most upfront but resets the compliance clock and avoids the pattern where a patched panel fails again within a year or two.
| Condition | Likely Cause | Recommended Method | Verification Step |
|---|---|---|---|
| Hairline crack, no offset | Shrinkage | Monitor | Reinspect at 6-12 months |
| Narrow crack, stable | Freeze-thaw | Seal | Visual check next season |
| Minor offset under 1/4 inch, isolated | Settlement | Shave/grind | Straightedge recheck |
| Structural crack, adequate width | Settlement or shrinkage | Epoxy injection | Test injection, port review |
| Recurring offset, tree nearby | Root intrusion | Full-panel replacement | Post-repair inspection with root barrier |
Weather matters more than most owners expect. Epoxy injection needs stable, moderate temperatures to cure correctly, and full-panel pours need to avoid both freeze risk and the flash-set problems that come with extreme heat, which narrows your practical repair window in a lot of climates to spring and fall.
Who Should You Hire, and What Should You Demand?
For anything beyond a small shave/grind repair, you need a licensed concrete contractor, and for epoxy injection specifically, you want a crew with documented experience running test injections before full execution, since poor metering or port spacing leads to weak bonds and recurring leaks. Ask for their contractor license number, proof of insurance, and, if your municipality requires it, confirmation that they're authorized to self-certify minor repairs.
At closeout, demand these documents before you release final payment:
- Signed inspection report referencing the permit number.
- Itemized invoice describing the scope of work performed, not just a lump-sum total.
- Before and after photos matching your own location log.
- Engineer or architect stamp, if your jurisdiction requires one for structural repairs.
Watch for red flags during the bidding process. A contractor who quotes a price without ever mentioning a permit is either unfamiliar with your municipality's rules or planning to skip the step entirely, and you'll inherit that liability. Vague scope language ("repair sidewalk cracks as needed") invites disputes later about what was actually covered. No warranty on epoxy injection work is a real concern, since bond failure can show up months after the crack looks fixed on the surface. Staged inspections (before work starts, mid-repair, and at final walk-through) catch these problems early and make the final municipal review far smoother.
Pro Tip: Ask every bidding contractor the same direct question: "What's your process if the post-repair inspection fails?" A contractor with real experience answers immediately and specifically. One who hesitates or gets vague hasn't been through a failed reinspection before, and you don't want to be the one teaching them.
When Does Rubber Paving Make Sense Instead of Concrete Repair?
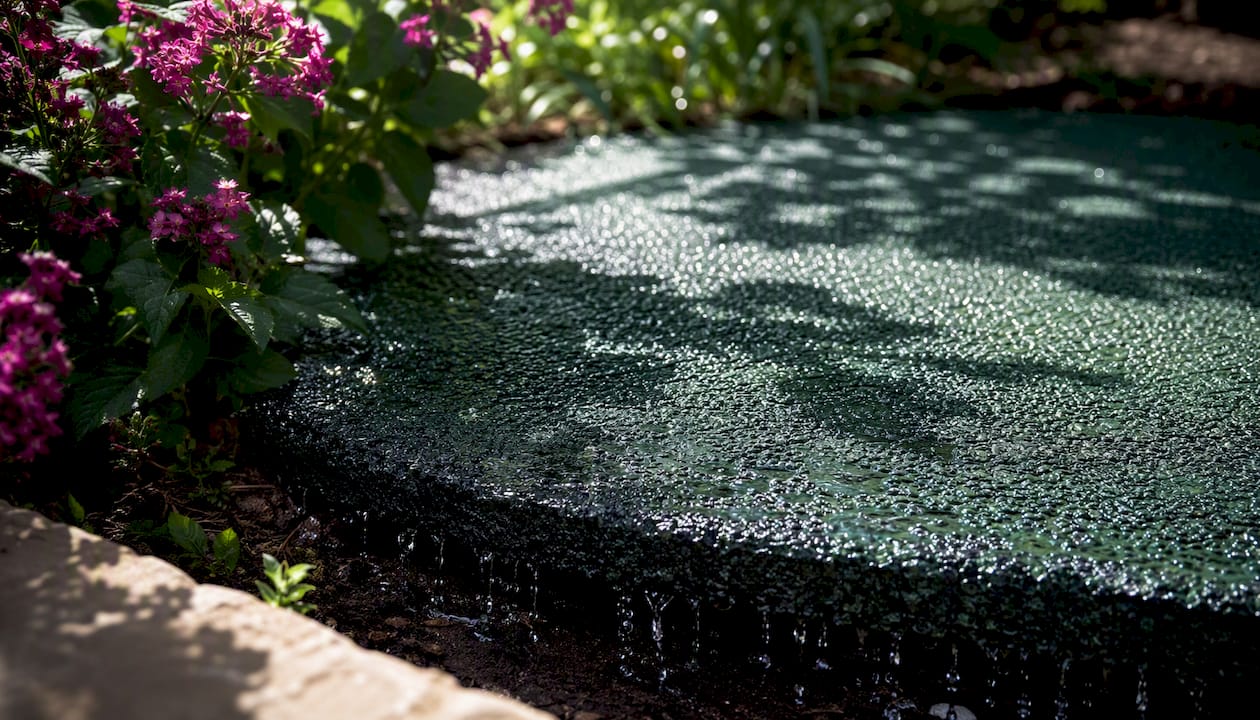
For sidewalks that keep failing inspection year after year, the underlying problem usually isn't the last repair, it's the material. Concrete cracks from shrinkage, settlement, root pressure, and freeze-thaw cycles, and every one of those forces keeps acting on the surface after you've patched it. A porous rubber surface like the Rubberway® system flexes instead of cracking under root pressure and drains water through the surface itself, which removes the standing-water freeze-thaw cycle that causes a lot of repeat concrete failures in the first place.
If you're weighing this option for a recurring crack zone, permitting still applies. Work in the public right-of-way typically needs the same municipal sign-off as a concrete repair, and the finished surface still has to meet the same ADA slope, texture, and detectable warning requirements that concrete does. It's a material swap within the existing compliance framework, not an exemption from it.
Before choosing an installer for an alternative surface, ask these questions:
- What's the documented ADA slip-resistance and slope tolerance for this material?
- What warranty terms cover cracking, fading, or drainage performance?
- How does the surface perform in standing water after heavy rain?
- What's the realistic installation timeline for the affected square footage?
- Who handles the permit application, the owner or the installer?
Pro Tip: Get warranty terms in writing before signing, specifically what's covered if the surface cracks or degrades within the first two years. A vague "manufacturer's warranty applies" clause is worth almost nothing if the installer can't tell you the exact terms on request.
Why a Compliance Checklist Protects You Legally and Financially
Most owners treat a cracked sidewalk as a maintenance annoyance until it shows up during a property sale, and by then it's a much bigger problem. Unresolved sidewalk violations routinely block title transfers and refinancing, which means the checklist you're running isn't really about the concrete. It's about keeping a clean paper trail that a title company, a lender, or a city attorney can review without questions.
I'd argue the biggest mistake program managers make isn't skipping repairs, it's skipping the documentation on repairs they actually did. A property with three completed shave/grind repairs and zero photo records looks, on paper, identical to a property that never touched the problem. If you manage multiple properties or a municipal route, here's what actually reduces long-term risk:
- Inspect on a fixed schedule (annually for most properties, more often near mature trees or known settlement zones).
- Retain every inspection report, permit, and Certificate of Compliance for the life of the property, not just until the next sale.
- Organize records by address and defect location so a title search or refinance request doesn't turn into a scavenger hunt.
- Reinspect completed repairs at the one-year mark, since epoxy bond failures and shaving relapses often surface within that window.
Accurate measurement at the front end is what makes all of this cheap. A property owner who measures correctly the first time spends less over five years than one who guesses, patches wrong, and redoes the same panel twice.
A Longer-Term Option for Crack-Prone Sidewalks
If you're patching the same stretch of sidewalk every year or two, Ecotecrubber offers a different starting point: a porous rubber surface that flexes under root pressure instead of cracking, drains standing water through the material itself, and meets ADA slope and texture requirements out of the box.
That matters most in the recurring-failure zones this checklist keeps flagging, mature tree root corridors, low spots that pool water after rain, and high-traffic commercial walkways where concrete takes a beating every season. Before you commit to another round of grinding and patching on a panel that's failed inspection twice already, it's worth asking an installer directly about ADA tolerance, warranty terms, drainage performance under heavy rain, and how the permit process works for a surface swap in the public right-of-way. You can review the Rubberway® product specifications or request an assessment for a specific problem area on your property or municipal route.
Primary Sources and Standards to Consult
These are the documents worth bookmarking if you're managing sidewalk compliance on more than one property or route.
- Sidewalk certification FAQ, City of Oakland: the clearest public example of a quarter-inch defect threshold, provisional certificate rules, and self-certify scope limits.
- Portland: a straightforward model of the permit-to-final-inspection sequence for public right-of-way work.
- ACI Spec 503.7, epoxy injection: the technical checklist contractors should cite for evaluation, surface preparation, and execution of epoxy crack repair.
- TxDOT crack repair guidance: detailed procedures and width limitations for pressure-injected epoxy, useful for evaluating a contractor's proposed method.
- Sidewalk repair checklist, City of Independence and Boston: additional municipal examples showing how acceptance criteria and permit steps get formalized in practice.
Frequently Asked Questions
What vertical offset fails a sidewalk inspection? Most municipalities, following Oakland's standard, treat a vertical offset of 1/4 inch or more as a defect requiring repair before a compliance certificate can be issued.
Do I need a permit to repair a small sidewalk crack? Often not, if the repair stays under your city's self-certify area limit, commonly around 25 square feet. Anything larger typically needs a licensed contractor and a right-of-way permit.
How narrow is too narrow for epoxy injection? TxDOT guidance notes that injection becomes impractical below roughly 0.005 inch in width, even though the resin can technically penetrate cracks as narrow as 0.002 inch under ideal conditions.
What happens if I don't repair a flagged sidewalk defect? Cities can perform the repair themselves and bill you, and an unpaid bill can turn into a lien on the property, which frequently surfaces during a sale or refinance.
Can I get more time if I can't finish repairs before a title transfer? Many programs modeled on Oakland's allow a provisional compliance certificate with a 120-day extension, sometimes with additional extensions if you document active progress.
Is rubber paving a compliant alternative to concrete sidewalks? Yes, when installed to meet the same ADA slope, texture, and detectable warning requirements that apply to concrete, and it still requires the standard municipal permit for right-of-way work.
This article is general information, not a substitute for advice from a qualified lawyer. Consult a qualified legal professional about your own circumstances before acting on anything here.
Sources
- Sidewalk certification FAQ | City of Oakland, CA
- Portland
- Crack repair — pressure-injected epoxy | TxDOT guidance