
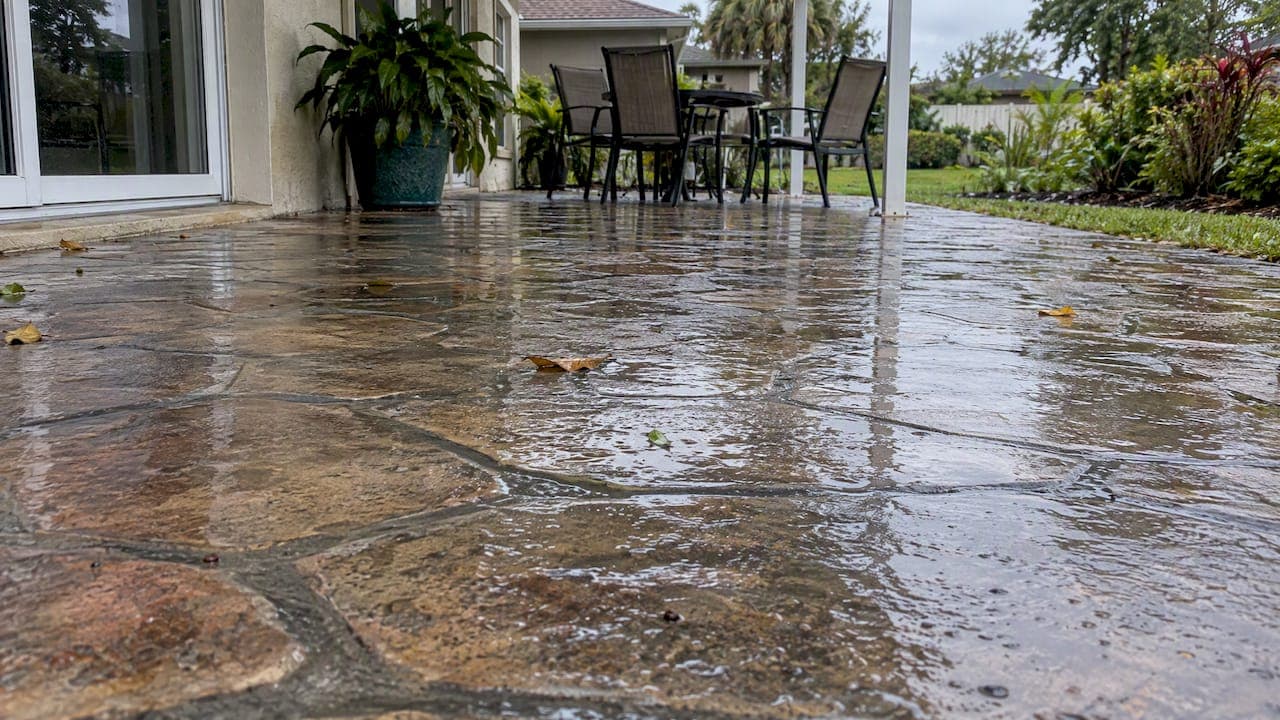
The fastest reliable fix for a slippery stamped concrete patio is a thorough cleaning followed by resealing with a non-slip additive mixed into the topcoat. If gloss keeps coming back or the area sees pool traffic, light mechanical texturing or full resurfacing solves it for good. Expect a trade-off between a glassy, showroom look and real traction, and plan to reseal every few years to keep grip from fading.
TL;DR:
- Start with moderate pressure washing, concrete safe detergent, and thorough rinsing; let the patio dry for at least 24 hours before reassessing traction.
- For acrylic resealing, measure up to about 3 ounces of additive per gallon; polymer grit preserves appearance, while aluminum oxide suits busier or poolside areas.
- If slick glazing returns after cleaning and additive resealing, remove the old sealer before grinding or blasting, which can alter the color and stamped pattern.
- For new work, specify deeper stamp texture, proper drainage slope, and a penetrating or low solids sealer; embedded grit lasts longer than a surface additive.
Table of Contents
- Why stamped concrete gets slippery
- Quick DIY fixes you can try this weekend
- Resealing with non-slip additives: how to do it and what to expect
- Mechanical surface fixes: etching, grinding, and blasting
- Preventing slipperiness during installation or resurfacing
- When to hire a pro and realistic outcomes and cost expectations
- Author perspective: practical safety-first advice from a surface specialist
- EcoTec Rubber Paving: an alternative for long-term non-slip resurfacing
- FAQ
- Sources
Why stamped concrete gets slippery
Most slippery patios share one root cause: the sealer, not the concrete itself. A topical acrylic sealer applied too thick, or in too many coats over the years, forms a plastic-like film on top of the texture. That film smooths out the surface and traps a thin layer of water whenever the patio gets wet, which is exactly when traction matters most. Overapplied or high-gloss sealers can even "blush" or haze, a sign the coating has built up beyond what the surface needs.
Finishing technique plays a role too. Stamps with shallow relief, or a slab that was troweled too smooth before stamping, leave less mechanical grip even before any sealer goes on. Add pooling water from poor slope, plus mold or mildew feeding on organic debris in low spots, and a patio that was fine when new can turn hazardous within a season.
Industry professionals often reference ASTM D2047's static coefficient of friction benchmark, which uses a value around 0.5 for polish-coated walkways in lab testing. That number is why contractors talk about traction in measurable terms instead of guessing by feel.
The usual culprits, in order of how often they show up:
- Thick or multiple layers of high-gloss topical sealer
- Smooth stamp texture or over-troweled base concrete
- Standing water from inadequate slope or clogged drainage
- Mildew, algae, or pollen film sitting on top of the sealer
Quick DIY fixes you can try this weekend
Before you touch a sealer or a grinder, start with cleaning. Most slippery patios improve noticeably once the organic film and sealer grime are gone, since that buildup is a major contributor to lost traction.
- Sweep loose debris, then pressure wash at a moderate setting with a fan tip, holding the nozzle 12 to 18 inches from the surface.
- Apply a concrete-safe detergent or a dedicated mildew remover, let it sit per the label, then scrub stubborn spots with a stiff-bristle broom.
- Rinse thoroughly and let the patio dry completely for at least 24 hours before judging how slick it still feels.
- Test a small, inconspicuous section first if you plan to add a cleaner you have not used before.
- For steps or a single hazardous spot, add textured rubber mats or adhesive traction tape as a temporary measure while you plan a permanent fix.
If you have access through a local provider, a professional patio cleaning service like Berks Pressure Washing can handle mildew removal and buildup more thoroughly than a weekend rental unit, especially on larger patios.
Pro Tip: Walk the patio barefoot or in socks right after it dries. Bare skin picks up residual slickness that shoes often mask.
Skip the DIY route if you are dealing with a large area that needs full sealer stripping, if the cleaner involved is a strong chemical stripper, or if the real issue is drainage and grading rather than the surface finish. Those jobs call for equipment and experience most homeowners do not have on hand.
Resealing with non-slip additives: how to do it and what to expect
Once the patio is clean and dry, a non-slip additive mixed into fresh sealer is the next practical step. Three additive types dominate the market, and each comes with a different look.
- Polymer grit stays suspended in the sealer and keeps a mostly clear, natural finish, making it a common choice for homeowners who don't want a visible texture change.
- Aluminum oxide grit is more aggressive and durable but tends to settle, so it needs more frequent stirring during application and can slightly dull the surface sheen.
- Fine silica sand is the cheapest option but wears faster and can feel gritty underfoot compared with the other two.
Dosage commonly runs up to about 3 ounces of additive per gallon for many acrylic sealers, a ratio that balances traction against keeping the sealer workable. Overmixing makes the sealer thick, hard to spread evenly, and prone to clumping, so measure rather than eyeball it.
For application, strip or clean the old coating first, then test the new sealer and additive on a small patch before committing to the whole patio. Grit-loaded sealers generally cannot be sprayed evenly, so plan to roll them on, either broadcasting the additive into wet sealer or mixing it in beforehand depending on the product instructions.
Expect the additive to wear down with foot traffic and UV exposure over time. Resealing every 2 to 3 years is typical for acrylic systems, and a return of slickness or fading color is the usual sign it's time to refresh. Our guide to DIY steps for fixing slippery concrete walkways walks through the cleaning and testing sequence in more detail.
Mechanical surface fixes: etching, grinding, and blasting
When cleaning and resealing don't solve the problem, usually because years of layered sealer have built up a slick glaze, mechanical methods change the surface profile instead of coating over it.
- Acid etching uses a mild acid wash to roughen the top layer of concrete, improving grip without major equipment.
- Light mechanical grinding removes sealer buildup and glazing more evenly than acid alone, revealing texture underneath.
- Sand or soda blasting strips old sealer completely and can restore stamped detail that heavy coatings have softened over the years.
Mechanical profile changes like grinding or blasting create a more lasting texture than additives sitting on top of a sealer film, since they alter the concrete surface itself rather than relying on a coating to provide grip. Existing sealer almost always needs to come off first, or the new texture won't bond properly.
These methods also come with trade-offs: etching and blasting can lighten color or alter the stamped pattern slightly, and cleanup involves managing runoff or dust depending on the method. For a small patio section, a motivated homeowner might manage light etching, but full-area grinding or blasting is best left to a professional with the right containment and safety equipment.

Preventing slipperiness during installation or resurfacing
If you're pouring a new patio or planning a full resurfacing, you can design out most future slip problems rather than fixing them later.
- Choose a stamp pattern with deeper, more defined texture, and avoid over-troweling the base slab before stamping.
- Have your contractor broadcast color hardener into the surface, or consider exposed aggregate in pool decks and other wet-prone zones, since embedded grit holds up longer than anything applied on top later.
- Ask for a penetrating or low-solids sealer rather than a thick, high-gloss topical coat, especially anywhere water collects.
- Confirm the slab has proper slope for drainage before the pour, not after.
- Request a sample panel so you can test traction and check the look before the full job is approved.
ACI and PCA guidance generally steers decorative concrete away from smooth, high-gloss finishes in exterior or wet-prone settings for exactly this reason.
When to hire a pro and realistic outcomes and cost expectations
Call a professional when the glazing keeps returning after cleaning, water pools persistently in certain spots, the patio surrounds a pool or entrance where falls carry real liability, or you simply can't get even texture back with DIY tools.
- Ask what method they'll use, sealer stripping and reseal, a textured coating, a cementitious overlay, or full resurfacing with a rubber system.
- Get quotes from at least two or three contractors, since cost depends heavily on square footage, how much prep and stripping is needed, and local labor rates.
- Request before-and-after photos from similar jobs, confirm licensing and insurance, and ask for references you can actually call.
Author perspective: practical safety-first advice from a surface specialist
Start conservative. Clean thoroughly, test an additive on a small patch, and document how it performs before committing to the whole patio. Save grinding or full resurfacing for cases where the hazard keeps coming back or you're willing to trade some of that original stamped look for real traction. When grip has to be maximized long-term, a rubber overlay is worth comparing against another reseal cycle.
— Roger
EcoTec Rubber Paving: an alternative for long-term non-slip resurfacing
Cleaning and resealing buy time, but they're still a surface coating sitting on top of concrete, which means the same slipperiness tends to return as the additive wears down. A rubber overlay through our Rubberway® system takes a different route: instead of a film that can glaze over, it installs a porous, textured surface designed to drain water through itself rather than let it pool on top.
That drainage behavior is the core difference from any topical fix, and it's why we position rubber resurfacing as a longer-term option rather than a quick patch. Our team can evaluate whether a rubber overlay makes sense for your specific layout. Take a look at our Rubberway® product lineup or reach out through our main site to get a quote for your patio.
FAQ
What is the best anti-slip product for stamped concrete?
There's no single best product. Polymer grit additives mixed into acrylic sealer offer the most natural look, while aluminum oxide grit gives stronger traction for high-traffic or pool areas at the cost of a slightly duller finish.
What is the average lifespan of a stamped concrete patio?
A well-installed and properly sealed stamped concrete patio can last for many years, though the sealer and any traction additive wear out long before the concrete itself does. Expect to reseal roughly every 2 to 3 years to keep both appearance and grip intact.
What is the best anti-slip sealer for stamped concrete?
A low-solids or penetrating sealer with a non-slip additive mixed in, around 3 ounces per gallon for many acrylic products, tends to balance grip and appearance better than a thick, high-gloss topical coat. Penetrating sealers in particular avoid the heavy surface film that causes glazing over time.
Is stamped concrete slippery when wet?
Yes, stamped concrete can become noticeably slippery when wet, mainly because topical sealers form a film that traps a thin layer of water on the surface. Cleaning, adding a non-slip additive to the sealer, or switching to a penetrating sealer all reduce that risk.
How do I know if my stamped concrete patio needs resurfacing instead of resealing?
If cleaning and additive-loaded resealing don't fix the slipperiness, or if the glaze keeps returning within a year, the sealer buildup may be too thick to manage with a topcoat alone. At that point, mechanical stripping, texturing, or a full overlay like a rubber resurfacing system is worth comparing against another reseal cycle.
Sources
- Is stamped concrete slippery? - Sundek
- Making slippery stamped concrete slip-resistant - ConcreteNetwork
- ASTM D2047 James Machine static coefficient of friction test - Capital Testing
- Is stamped concrete slippery? Improve slip-resistance - Everything About Concrete